My iPhone’s camera has been a key instrument to video record many especial events. However, holding the iPhone just with bare hands (not in the incorrect portrait position) does not produce good results. The solution to this issue was to acquire an iPhone tripod holder and use it with a tripod. This provided a more stable video image and I also could record longer. However, after a period of time, a very short one, I asked myself: Won’t it be nice to be able to record with multiple cameras? Yes, multiple cameras, what a crazy idea!
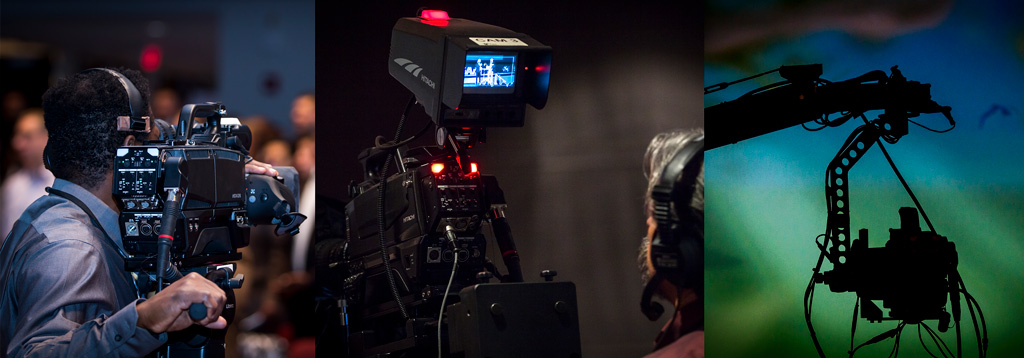
When we picture multiple cameras video recording the first thing that comes to mind is all the expensive equipment involved, the cameraman/camerawoman, video editing, cables, transportation, setup and packing, and all the complexity this process requires. But surely the main thing that stops everything is the high cost. Who has the budget for that, right? Well, if you have the budget for that this article is not something you should be reading.
I have an innate attraction to “crazy ideas” so I decided to tackle this “issue”. I started to investigate what would be the best, most affordable way to have a multi camera video recording setup. The criteria were:
- Easy to transport, install and pack.
- One person setup and operation.
- Minimal equipment requirements.
- Easy post production.
After a period of searching and testing I can finally tell you the good news: This is possible! I have been using this setup for a while and I am OK with the results. A multi camera recorded video is much more interesting than a single camera video one. And you look cool too.
The bad news (if we could call it bad) is that this solution it is not for the “purist” audio/video geek who keeps dreaming about high budget setups and is not able to live with some compromises. So, if you are one of them this is when you stop reading.
This setup uses the camera you already have, the iPhone’s camera which is a decent video recorder. This process can use up to 4 iPhones, requires an iPad to control the iPhones, and uses the MultiCam App ($5) installed in the devices. If you have the devices under your Apple Family plan you just need to purchase the App once and install it in all the devices, which is my case. Otherwise you will have to buy the App for each device.
The setup requires all the devices on the same Wi-Fi Network. The App in the iPad links to the App in the devices using the local network. This could be the tricky part if you want to video record in a non Wi-Fi area. I solved this problem with a mobile router which creates its own Wi-Fi network.
Apart from having access to the iPhones and iPad I also used the following equipment (depending on the event I will use 3 or 4 iPhones):
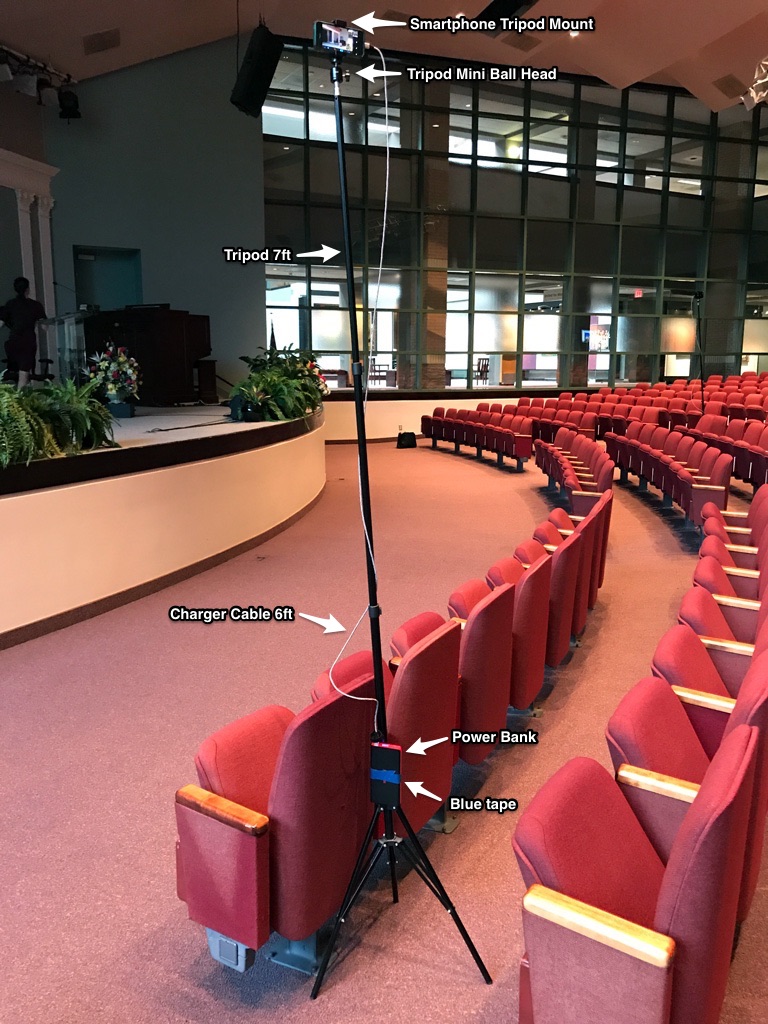
- Light stands (7 ft). One for each iPhone. Light stands are recommended because they have a smaller foot print and can be discretely located. Also these are taller than regular photo/video tripods.
- Tripod Mini Ball Head. One for each tripod. This allows to point the iPhone’s camera in the right direction. Believe me, this is an important feature to have.
- Smartphone Tripod Mount. One for each iPhone. I choose these aluminum tripod mounts because they have a strong grip on the iPhone. I would not like the iPhone falling just because somebody shakes the stand and the holder was not strong enough to stop the iPhone from slipping away . However any phone holder with a 1/4 thread will work (at your own risk).
- Portable Power Bank. One for each iPhone. It is important to have these to allow the iPhones’ batteries to last long enough to capture the complete event. Any power bank would work. Video recording is a very demanding task which consumes battery very fast.
- 6ft iPhone Charger Cable. One for each Power Bank. This is to connect the iPhone to the power bank which will be located at the bottom of the stand. You don’t want to have the iPhone and the bulky power bank at the top of the stand badly affecting its center of gravity. Get this long charger cable.
- Wireless Travel Router. This is a very important item to connect all the devices. This router creates its own Wi-Fi network and I connect all the devices to it. In this way I am not dependent on external Wi-Fi networks. It also gives me the mobility to video record at any location. Another advantage of using this device is that I am sure that the Wi-Fi will work and I don’t have to compete with others using the Wi-Fi, or ask for the Wi-Fi password. Nothing is more annoying than starting to record and suddenly the iPhones unlink from the iPad because the network guy decided to “fix” an issue in the Wi-Fi so restarted the network. Just remember that that guy does not care about your multi camera video production.
As in my case you may already have some of this equipment so it may not be a “big” investment. The equipment does not have to be exactly as what is recommended here but has to be functional for this process.
The image below shows a typical setup using the mentioned equipment. I use painter blue tape to attach the battery back to the stand and sometimes to organize the hanging cable too. I found it easier to use and dispose of than Velcro bands, especially when trying to pack all the equipment in a short period of time.
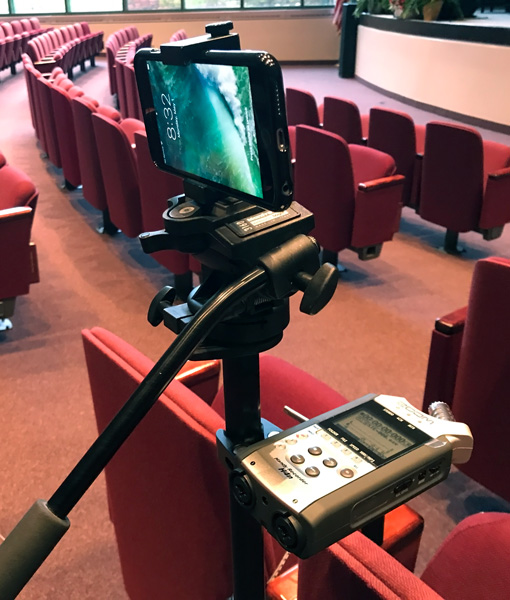
Beyond this you can use your creativity and use other equipment as well. Depending on the situation I will use 3 stands and add a pro-tripod with a video head so I can use it to tilt and pan the camera depending on the subject location. Of course this tripod will be strategically located near to the event stage. I will purposely be seated in a good location controlling this tripod while also operating the iPad. You have to arrive at the event early to set up the equipment and find a nice location to sit and take some photos as well.
In the photo below you will see that I am using a semi-pro audio digital recorder. This is the already old Zoom H4n which does a very good job. However it adds an extra layer of complexity because you need to post-edit the audio and later sync video and audio for the final product. I will say that 90% of the time you will not need to go to that extreme for your audio recording. Just stop listening to the geek inside you that is saying “get it! get it!”.
However, just for “curiosity” you may want to test this generic iPhone Mic or this other mic for iPhone7 to enhance the audio recording in the iPhone. I think I am safely advising you because I already told all the “purist” audio/video guys to stay away from this article!
Actually, the best way to get good audio is to coordinate with the audio “engineer” of the event and ask them to record the event’s audio and later share it with you. I have done this several times and it works well if the audio guy knows what he/she is doing. However if the audio “engineer” does not have much experience the iPhone audio will surely be much better. It has happened to me. Sometimes they mess things up and are surely not reading this.
After all the iPhones are set up in their strategic location, the next step is to connect the iPhones and the iPad to the Wi-Fi router. Each device has to have the MultiCam App opened. The iPad is used to link to the iPhones and control the recording. The image below shows a screenshot from the iPad controlling 3 iPhones.
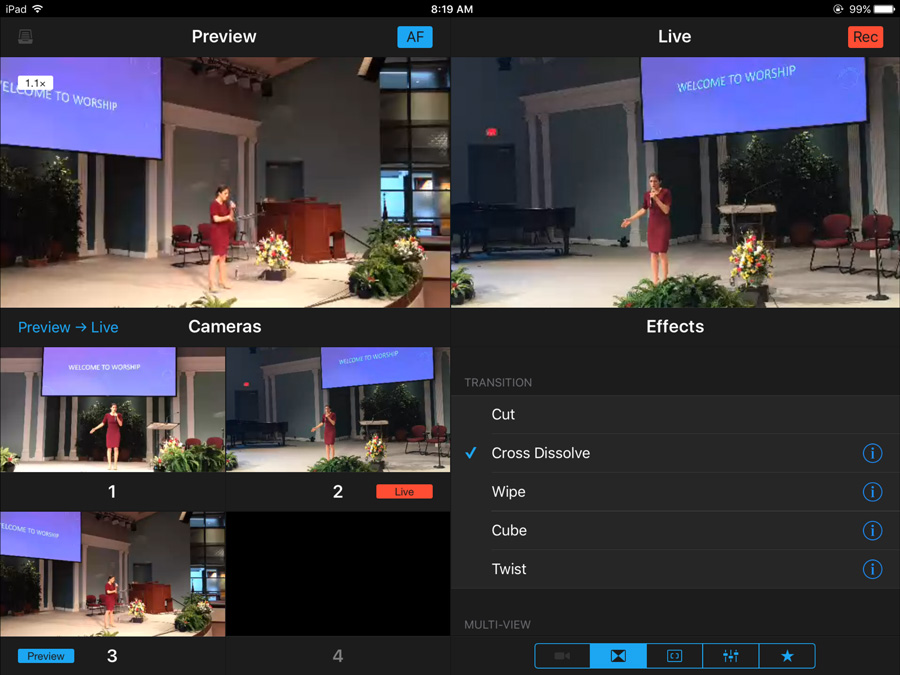
With simple taps the app allows you to decide which camera is “Live”. It applies some transition effects. The Preview screen allows you to focus using a simple tap. You can also decide which iPhone will be the one recording the audio. Use the iPhone facing the center of the stage.
After the event you need to tell the app to download the footage from the iPhones into the iPad. This process takes a long time using Wi-Fi especially for extended events. The faster way is to use iTunes to download the videos to the computer and later upload the videos to the iPad. Once the iPad has the footage from the iPhones the App will generate a video which will include all the camera changes.
The final video can be exported to your Photos’ camera roll. Using the Photos App you can trim the beginning and the end and from there upload to YouTube or Vimeo. However you could also open the iMovie App to add some titles and other effects and from there upload to the internet. If you have recorded the audio separately you will have to download the video to your Mac and use iMovie to sync the audio, add titles, correct color, and other tricks which surely is just extra work.
If you are getting help from a “purist” audio/video guy who is insisting that you use Adobe Premier, just tell him: Stop the madness! Don’t fall in the trap, just tell them to use iMovie which is enough. If they still want to argue with you just go and watch a couple of YouTube videos about how to use iMovie and you will be able to do it yourself. Remember that you are not competing for any Oscar with this video.
How to do better? Well, you have to practice, and practice, and practice. I have done this process many times but I recognize that I have to practice more. I have to learn to set the iPhones in places where they can better use the lightning of the room. Or choose the camera in the right moment. Or even remember to tap to focus in the right spot.
I want to share a video I recorded using 2 iPhones on stands, plus one iPhone on a tripod. This is a worship participation by Alessandra Sorace at the General Conference Headquarters. I want to say thank you to Alessandra for letting me record her. As I mentioned before I used the Zoom H4n to record the audio, and to be honest, for an untrained ear, there was not much difference from the audio recorded with the iPhone. And I don’t get tired of repeating this. Please audio/video “purists”, if you are still reading this, do not watch the video! Really, I am serious.
The great advantage of all of this is that I can setup and mange the multi camera recording without external help. This is great because you know how “easy” it is to find reliable people, right? I even have time to take some SDLR photos of the event at the same time, I just carefully carry the iPad around. In summary, I am having fun with this process.
If you want to see a video showing how MultiCam works check this one. There is also a Frequently Asked Questions page which you can consult.
The same company producing MultiCam app also has another product called Switcher Studio. This app is prepared for live streaming. I have not tested it.
I hope this experience inspires you to migrate from a “hand based video recording” to the interesting experience of “multi camera video recording”. Yes, you may not get a high quality video which an expensive setup could provide. But you will produce a decent multi camera video which is much better than only one camera, or no camera at all. And of course a multi camera video is something nice to share with others with pride (good pride BTW).
I just want to add that all this uses Apple products: iPhone and iPad. I am an Apple guy so this fits me. I have no idea if this is possible using Android devices and I am not planning to find out. That is Googles’ search responsibility.
Now….. What if I want to still have multi camera video recording, operated by only one person, but at the same time be able to tilt, rotate, and zoom the cameras, all this without selling my kidney? mmmmm….
From the lawyer: The author of this article is not responsible for any damage cause by the attempt to use, imitate, copy, reproduce, modify, hack, and exploit any advice provided in this article.